

A closure is the cheapest component on a filled jar and the one most likely to generate a complaint. Leaks, stuck caps, a band that cracked in the shrink tunnel, a valve that clogged with crystallised honey three weeks into winter. None of those are bottle problems. They are closure selection problems, and they are decided when the jar and cap are specified together, not on the filling line.
This is written for honey packers, co-packers and distributors buying jars and closures as a matched set. It covers the four closure families used on honey, what each tamper-evident option actually proves, the torque window that decides whether a liner seals, and the food contact and labeling rules to clear before a first production run.
The four closure families used on honey
Naming matters here because suppliers, capper manufacturers and jar makers use different words for the same geometry. Get the neck finish and the closure type onto one line of the purchase order before you ask for a price.
| Closure family | How it seals | Where it is used on honey | What goes wrong |
|---|---|---|---|
| Continuous thread screw cap (CT) | Threads run unbroken around the skirt; the cap compresses a liner against the jar rim as it is torqued down | Glass jars and PET bottles at every size; the default for retail honey | Under-torque leaves a leak path; over-torque distorts the liner or cracks the cap; without a liner there is no hermetic seal at all |
| Lug or twist-off cap | Four to six lugs engage the jar’s interrupted threads over a partial turn; a plastisol liner is softened by heat at application to form the seal | Wide-mouth glass honey jars and food jars; common where a vacuum “button” is wanted | Requires heat at application and a correct lug count match; a mismatched lug pitch never seats |
| Squeeze valve or reflux cap | A silicone or elastomer valve in a flip-top or nozzle closure opens under pressure and closes on release, cutting drips and letting honey flow back | Squeeze bottles and dispensing containers, food service and household formats | Crystallised honey blocks the orifice; valve stiffness varies by supplier and should be tested with your honey at its winter viscosity |
| Press-on or friction-fit lid | An interference fit over the jar rim, sometimes with a gasket | Gift pots, sampler jars and short-run presentation packs | No reliable hermetic seal; use only where a secondary tamper-evident band is applied |
Two selection rules follow from that table. First, the closure is specified against the neck finish, not against the jar’s appearance: a 43 mm lid is meaningless until you know whether the finish is a continuous thread or an interrupted lug thread, and how many lugs. Second, honey is acidic — published values commonly fall between pH 3.2 and 4.5 — and hygroscopic, so a closure that is only mechanically tight will still let moisture in and out over a long shelf life. The liner is what makes the package hermetic, and the closure is what holds the liner in place.
The reflux valve closure is the one worth testing hardest, because the failure is seasonal. A valve that dispenses cleanly in August can weep or block in February on a honey that has started to crystallise. Ask the supplier for the valve’s opening pressure and the material specification, then run your own fill-and-invert test at the temperatures the product will actually see.

What each tamper-evident option actually proves
There is no federal requirement in the United States for tamper-evident packaging on honey. The regulation people cite, 21 CFR part 101 on food labeling, governs what the label says; the tamper-evident packaging rule at 21 CFR 211.132 applies to over-the-counter human drug products, not to food. Retailers, however, frequently impose the requirement themselves, and it is cheaper to design it in than to add it later.
| Option | What the consumer sees | Equipment needed | Limits |
|---|---|---|---|
| Shrink band or sleeve | A band over the cap and neck that must be torn to open | Heat gun, or a steam or hot-air tunnel on a line | Sized to the lid diameter — a 43 mm band for a 43 mm lid; uneven heat gives a ragged band and a poor shelf appearance |
| Breakaway ring on a CT cap | A ring joined by bridges that stays on the neck when the cap is first turned | None beyond the capper | Evidence is subtle; a ring can be slipped back on, so pair it with a band or an innerseal for high-value packs |
| Induction seal, foil innerseal | A foil disc bonded to the rim; the jar is sealed before the cap is even opened | Induction sealer, plus correct cap torque before sealing | Requires compatible liner and jar rim material; the cap must be re-torqued after sealing because liners back off |
| Vacuum button on a lug cap | A centre panel that is held down by vacuum and pops up when the seal is broken | Hot fill or a vacuum-capable closing head | Depends on achieving and holding vacuum; not a fit for cold-filled honey on a simple capper |
| Label or seal across the closure | A printed label bridging cap and jar that tears on opening | Label applicator | Adhesive performance on cold or greasy surfaces varies; test on the actual jar |
The strongest retail pack uses two independent layers: a mechanical closure, plus either a bonded innerseal or a band. That is not over-engineering. The two layers fail in different ways, so a band that cracks in transit does not mean the jar is unsealed, and an innerseal that survives does not depend on the consumer noticing a torn ring.

Torque, liners and the sealing window
Application torque is the torque used to tighten the closure onto the container during capping. It is the variable that decides whether a liner contacts the rim evenly, and it is the single most common cause of failed induction seals. The widely used starting guideline is that application torque should be roughly half the cap diameter expressed in inch-pounds, which puts a 38 mm closure at about 18 to 20 in-lb.
Published supplier tables give the working range by diameter. Treat them as a starting point and validate on your own line, then hold the number.
| Neck or cap diameter | Application torque, inch-pounds | Approximate conversion | Note |
|---|---|---|---|
| 28 mm | 12 to 21 in-lb | About 1.4 to 2.4 N·m | Small sampler and portion jars |
| 33 mm | 15 to 25 in-lb | About 1.7 to 2.8 N·m | Common on small honey bears and squeeze bottles |
| 38 mm | 17 to 26 in-lb | About 1.9 to 2.9 N·m | The most common retail honey finish; the half-diameter rule gives 18 to 20 in-lb |
| 43 mm | 17 to 27 in-lb | About 1.9 to 3.1 N·m | Wide-mouth jars; also the common shrink band size |
| 53 mm | 21 to 36 in-lb | About 2.4 to 4.1 N·m | Large food-service and family packs |
Three things turn a correct number into correct seals. Consistency beats magnitude: six people capping by hand produce six different torques. Check every head on a multi-head capper, because one worn tightening wheel gives you a periodic failure that looks random on the accumulation table. Re-torque after induction sealing, since closure liners back off during the sealing process. Test methods for seal integrity and leakage exist as published standards, and test houses and equipment suppliers can quote the specific method they run; confirm the method with ASTM International or your own laboratory before you write it into a specification.
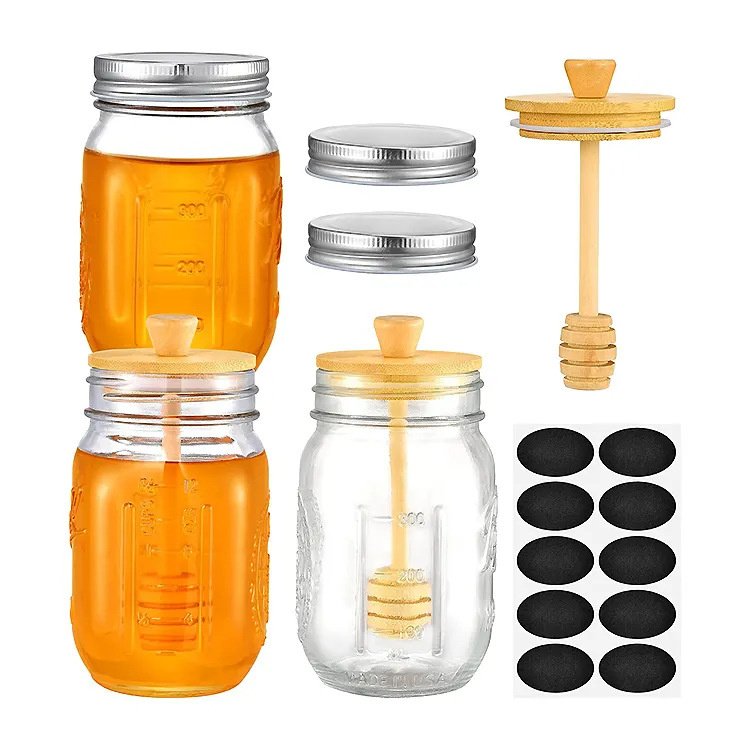
On the jar side, the selection work starts with the finish and the volume. Custom-logo glass honey jars give the best barrier and the best shelf presence but need a matched closure and a liner; a glass honey pot with a dipper is a gift format where a friction lid plus a band is the realistic answer. Whichever you choose, put the capper’s torque range and the jar’s neck finish drawing in the same document.
Food contact and labeling clearances
Every part of the closure that can touch honey — the cap, the liner, the valve, the band adhesive if it contacts the rim — is a food contact material and needs its own documentation.
In the European Union, the framework is Regulation (EC) 1935/2004, which requires that materials and articles intended to come into contact with food do not transfer constituents to food in quantities that could endanger human health or bring about an unacceptable change in composition. Plastic closures and liners then fall under the EU plastics regulation, which sets an overall migration limit of 60 mg per kg of food simulant, expressed as 10 mg per dm² where surface area is used, and requires a written declaration of compliance down the supply chain. Ask for that declaration by article, not by product family. The European Commission’s food contact materials pages are the place to check the current texts. On the U.S. side, polymers used in closures and liners are cleared as indirect food additives under 21 CFR part 177, and the closure supplier should be able to name the clearance for each resin and liner layer.
Labeling is a separate exercise and it sits with the label, not the cap. Net quantity, the ingredient statement and the responsible party all fall under 21 CFR part 101, and if you are using a tamper-evident feature, the labeling statement should name it so the consumer knows what to look for. Design the label artwork only after the regulatory text is fixed, because a label plate is expensive to redo.
When the bottling run happens
Closure problems are seasonal, so order against the extraction calendar rather than against the sales calendar.
In the northern hemisphere, the main honey flow runs broadly May through July across temperate North America and Europe, extraction follows through late summer, and bottling for the holiday season runs from roughly August to November. That puts the jar and closure order in the second quarter, with trials before the flow starts.
In the southern hemisphere, the same sequence shifts by about six months: the flow across Australia, New Zealand and southern South America runs roughly September to December, extraction through the late summer, and bottling from about February to May. Orders and line trials need to be settled around November to January.
In both hemispheres, run the valve and torque trials on honey that has been stored long enough to begin crystallising. A closure validated on fresh, warm honey tells you very little about February.
Summary for buyers
The decisions, in the order they should be made:
Match the closure to the neck finish first. Continuous thread, lug or valve — and the diameter — are decided by the jar, not by preference. Put the finish drawing and the closure part number on the same line of the order.
Treat the liner as the seal. The cap only supplies the force. If you need hermetic performance or an induction seal, specify the liner by material and thickness, and ask for its food contact declaration.
Hold torque in a narrow band and measure it. Start from the half-diameter rule — about 18 to 20 in-lb for a 38 mm closure — validate against a published supplier range, check every capping head, and re-torque after induction sealing. For volumes where consistency matters, a automatic filling and capping machine removes the operator variable entirely.
Add tamper evidence deliberately. Shrink band, breakaway ring, bonded foil innerseal or vacuum button: pick two independent layers for retail, and size the band to the lid — 43 mm bands for 43 mm lids.
Clear food contact and labeling before artwork. EU declarations of compliance under the plastics regulation, FDA resin clearances under 21 CFR part 177, and the 21 CFR part 101 label text.
Test in the worst month, not the best. Crystallised honey, cold jars and a cold capper are where closures fail.
For production and trade context per country, FAO’s pollination programme publishes the background on beekeeping and pollination that most market plans start from.