
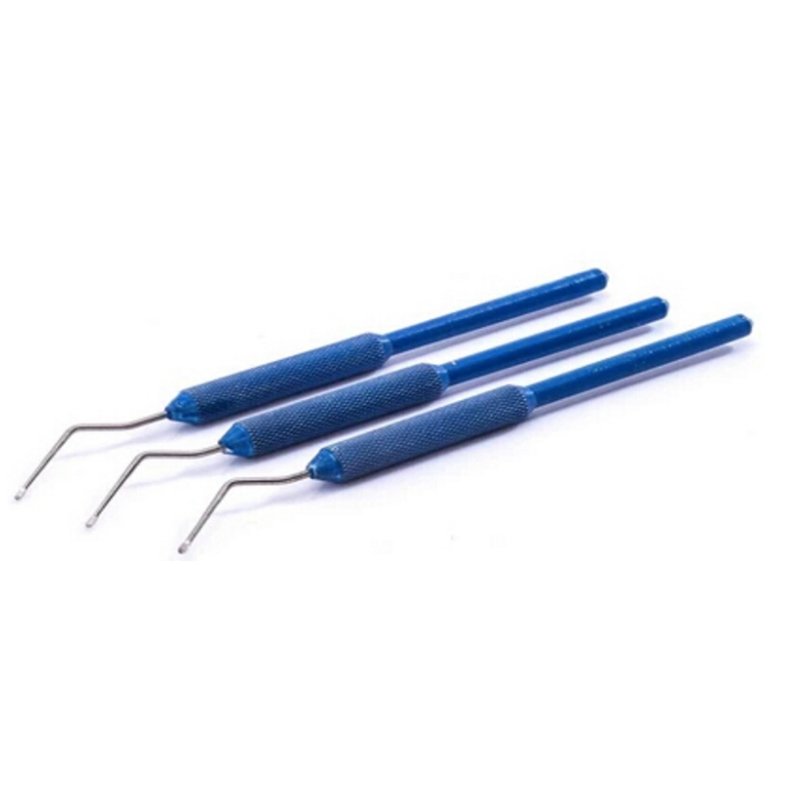
A queen rearing equipment commercial programme is bought as a system, not as a shopping list. Each part is cheap on its own and expensive to get wrong: a mismatched cell cup wastes a round of grafting, and a mating yard short of drones wastes five or six weeks of calendar that nobody can refund. Distributors and commercial apiaries placing container orders usually find this out in the second season, when the grafting tools turn up in volume and the mating equipment does not.
This article sets out how the pieces fit together: what goes on the equipment list, how those items are counted against each other, how a cell builder is configured, how many mating units a target output actually needs, how the calendar runs from grafting day, and which loss rates belong in the plan before anyone commits to a delivery schedule. Where a figure has a published source it is named. Where it depends on the model, hedging is honest and varies by source or model — ask the supplier for a measured test report.
What a commercial programme has to produce
Three products come out of a queen operation, and they do not need the same kit. Replacement queens for your own colonies are a volume job with a hard deadline: the birds have to be laying on a date fixed by your requeening window. Queens for sale are a shipping job, which brings banking, caging and labelling into scope. Breeding stock produced by instrumental insemination is a different workshop altogether, with its own bench, optics and gas supply.
The overlap between them is large enough to justify buying the shared core once: grafting tools, cell cups, cell bar frames, rearing frames, a way to build cells, a mating yard, cages, marking equipment and a record system. The USDA Agricultural Research Service keeps the research base for queen rearing and colony management, and it is the first place to check whether a protocol you are copying has been measured. The national picture on colony numbers and losses that drives demand for replacement queens each year is tracked in the US beekeeping survey run by the Apiary Inspectors of America.
Equipment list and the ratios behind it
Read the list below as ratios rather than quantities. Every line has a driver elsewhere in the programme, and the driver is stated so the numbers can be rebuilt for a different target.
| Item | Unit | What drives the number | Note for the purchase spec |
|---|---|---|---|
| Grafting needle or grafting tool | pieces | Minimum 2 per grafter, so a bent tip does not stop a round | Tip profile must match the cell cup you are running; stainless steel shaft, replaceable or spring tip |
| Queen cell cups (wax or plastic) | pieces | Number of grafts per round, plus spares for losses in priming | Base diameter must seat in your cup bar without wobble — tolerance varies by factory, ask for a sample before the container ships |
| Cell bar frame / rearing frame | frames | Grafts per round ÷ cups carried per bar | Cups carried per bar varies by source or model — ask the supplier for the drawing before sizing frames |
| Cell builder hive body | colonies | Grafts per round ÷ cells a builder carries | Must be deep enough for the rearing frame plus two frames of bees each side |
| Queen excluder | pieces | 1 per cell builder, 1 per finisher | Wire spacing consistent across the order; mixed lots jam in the same frame size |
| Mating nuc (mini or standard) | units | Ripe cells moved per cycle (see the funnel section) | Frame size must match the frames already in your operation |
| Drone mother colonies | colonies | NSW Department of Primary Industries puts this at 10 drone mother colonies per mating nucleus colony | Start them 6 weeks ahead of the graft date |
| Queen cages (introduction and mailing) | pieces | Number of mated queens shipped or introduced per cycle | Candy plug release time is 24–48 hours; cell size must not crush attendants |
| Queen marking tools and pens | pieces | 1 set per catching team | Colour set must cover the five-year code |
| Banking bars | bars | Peak number of queens held at once | Queens can be banked up to 21 days |
Two of those lines decide most of the order: cups and mating units. Everything else is either reusable across many cycles or purchased per person. When a container is being built, the usual mistake is to load the light, cheap consumables at the right multiples and the bulky, slow-to-make items — nuc bodies, rearing frames — at far too few.
Configuring the cell builder
The cell builder is the engine of the whole programme, and it is the part most often improvised. Its job is to accept grafted larvae and feed them to capping with nothing else competing for the attention of the nurse bees.
A standard configuration is a queenless colony crowded with young bees, holding a frame of pollen, one or two frames of honey, and enough sealed brood about to emerge to keep the nurse population rising. New South Wales DPI describes splitting one standard ten-frame hive into two four-frame nucleus colonies for this purpose, which gives two builders from one stock unit and keeps every frame of bees working. On a factory order that ratio matters: for every builder you intend to run, plan the woodenware for half a production hive, not for one.
Three things decide whether a builder performs:
Age of the bees. A builder is a colony of nurses, not foragers. Shake young bees in from several donor colonies, or set the builder up so sealed brood emerges into it continuously. A builder populated with foragers will feed weakly and cap unevenly.
Feed and pollen. Builders run on syrup and pollen whether the field is giving or not. When the flow stops during a rearing run, the acceptance drop shows up at the next check, three days later, when there is nothing to do about it.
Quiet. Sealed cells dislike vibration. Once the cells are capped, the builder should be opened only when there is a reason. This is also why neighbouring yards doing extraction in the same week cause damage that is hard to pin down afterwards.
The starter and finisher split is a refinement rather than a requirement. In a starter, the grafted larvae sit in a queenless, hopelessly crowded box for 24 hours to force acceptance; then the cells are moved to a stronger finisher that carries them to capping. Running both means two classes of colony to feed and manage. Skipping the starter and grafting straight into a strong queenless builder works for small programmes and is what a lot of operations do; the trade is lower acceptance when conditions are poor.
Grafting tools, cups and the failure modes
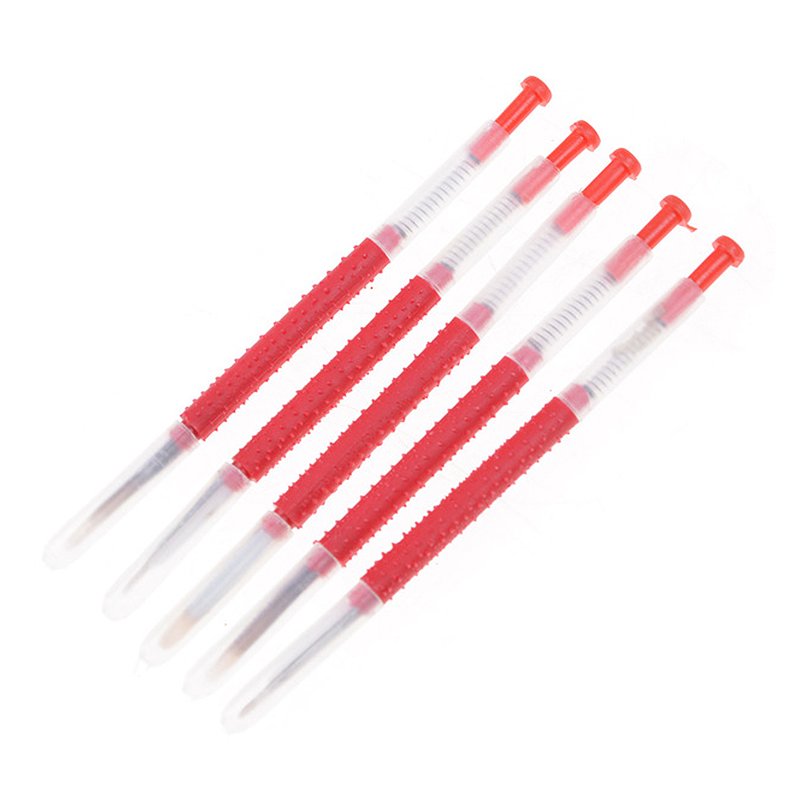
Grafting is the cheapest part of the programme per queen produced and the easiest to get wrong by buying badly. Two faults dominate.
The first is tip and cup mismatch. A grafting tip that does not slide under the larva without folding it will damage every graft in the run, and the damage appears as “bad acceptance” three days later. Operators blame the builder. The second is the cup seating: a cup that rocks in its bar gets pushed sideways by the bees, the larva shifts off its food, and the cell is abandoned. Neither fault is visible in a catalogue picture.
Wax cups made with a silicone mould versus moulded plastic cups is a choice most programmes settle by trial rather than by argument. Both work. Wax cups made on site are cheaper per unit and slower per hundred; plastic cups are consistent and cost more to ship. Either way, priming small drops of royal jelly into dry cups before grafting is standard practice, and either way the cup has to be sterile and free of anything that smells of solvent.
Lighting and working height cost more in lost larvae than most operations believe. Crossover benches, a light source that does not heat the frame, and a wet cloth over the donor comb while the grafter works are unglamorous items that move acceptance more than the tool brand does. Larvae usually come from a donor frame holding larvae 12 to 24 hours old; take from older larvae and queen quality falls, which several trials have quantified in terms of adult weight and ovariole number — consult the published trial before quoting a number, because results differ by stock.
Mating units: formats and the count that matters
Mating units come in two broad families, and the choice sets the size of everything downstream.
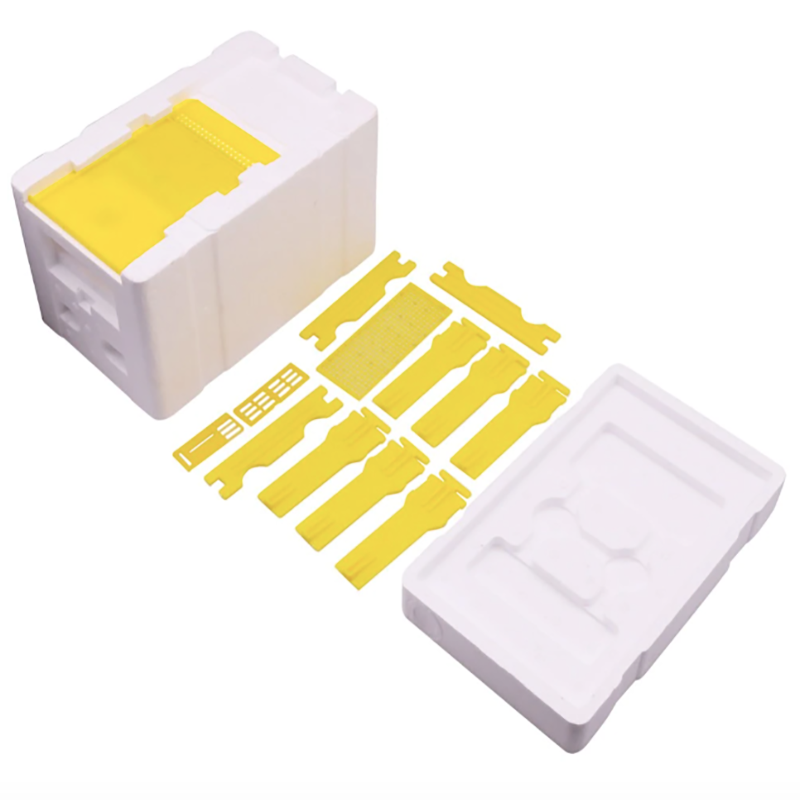
Mini mating units of the Apidea pattern are polystyrene cubes measuring roughly 11 × 11 × 11 cm, holding three miniature frames and started with about 100 g of nurse bees. Manufacturers publish those figures along with the matching cycle: around 10 to 14 days from introduction to a mated queen under reasonable conditions. One pallet of 288 units is a standard trading quantity.
Standard-frame mating nucs run three to five full-depth frames with bees, brood and stores. They need far more bees per queen, so fewer units can be run, but the resulting queens get a better start. New South Wales DPI notes the alternative practice of making a split above a division board in a production hive, so one strong unit mates a queen without surrendering its own population.
The ratio to plan against comes from the drone side, not the queen side. NSW DPI states plainly that for every queen mating nucleus colony you will require 10 drone mother colonies. Read that literally and a 100-unit yard needs 1,000 supporting drone colonies, which no small programme has. Read it as intended: drone supply is the constraint, so census it before scaling the nuc count, and either build the drone colonies or locate the yard where someone else’s drones are already flying selected stock.
Lay the yard out to reduce drift. Face entrances in different directions, paint units different colours, use hedges and trees as orientation marks, and space units further apart than feels efficient. A queen returning to the wrong box is a dead queen and an empty nuc with no obvious explanation.
The calendar, counted from grafting day
Below, grafting is day D+1. This matches the common extension calendar in which the breeder lays at day zero and larvae a day old are grafted; it also keeps the arithmetic in units of “days after grafting”, which is how the work is actually scheduled. Temperatures shift emergence by about a day either way, so treat every date as a window and check for emergence daily from D+11.
| Day (grafting = D+1) | Stage | Work on that date | Numbers to record |
|---|---|---|---|
| D+0 | Donor frame prepared | Confine breeder queen; check drone colonies are flying | Donor colony ID, drone census |
| D+1 | Grafting | Move larvae 12–24 h old into primed cups; place in starter or builder | Larvae grafted, grafter ID, source colony |
| D+2 | Acceptance (within 24 h) | Count accepted cells; refill or re-graft misses; move to finisher | Cells accepted, % acceptance |
| D+6 to D+8 | Capping | No opening unless necessary; column stays shut | Colony disturbance events logged |
| D+10 to D+11 | Cells ripe | Move ripe cells to mating units; keep cells vertical | Cells introduced, unit IDs |
| D+12 to D+13 | Emergence | Emergence expected from grafting +12 days | Virgins emerged, % emergence |
| D+17 to D+22 | Mating flights | Leave units shut; do not open during the flight window | Weather daily min/max °C |
| D+23 to D+26 | First eggs | Queens begin laying roughly 11–12 days after emergence | Units with eggs, % laying |
| D+30 to D+33 | Brood assessment | Judge pattern solidity; grade and either sell, bank or cull | Mated queens graded and shipped |
Two timings carry most of the risk. Moving cells too early — during the first quiet days after capping — produces deformed queens, because the pupa is remodelling and rough handling at that point cannot be undone. Moving cells too late means the first virgin out kills every other cell in the batch.
Drone rearing has to be started before any of this. Drone brood takes 24 days to hatch and drones reach sexual maturity at around 16 days of age, so a drone intended to mate on day D+20 was laid roughly 40 days earlier. Fertility declines after about 28 days of drone age and they die around 55 to 60 days. A single full frame of drone brood yields around 700 mature drones. Those four figures together are why drone mother colonies set up six weeks too late cannot be fixed with feeding.
Batch capacity and the loss funnel
Capacity planning is arithmetic on published benchmarks, not a guess. Take the loss rates below as planning defaults and replace them with your own records after two cycles.
| Stage | Planning rate | Starting from 500 grafts | Consequence for the next stage |
|---|---|---|---|
| Grafts made | — | 500 larvae | Needs 500 cell cups and the matching bar capacity |
| Cells accepted at D+2 | 80% of grafts | 400 cells | Below 60% signals a grafting or builder problem, not bad luck |
| Ripe cells to units at D+10 | 90% of accepted cells | 360 cells | Sets the number of mating units needed in the yard |
| Virgins emerged at D+12 | 90% of ripe cells | 324 virgins | Shortfall here points to handling during the pupal window |
| Mated and laying at D+26 | 65% of emerged virgins | 210 laying queens | 60–70% is the usual band for this step |
Running those rates through: 500 grafts return about 210 laying queens, a little over 0.4 laying queens per graft. To ship 210 queens per cycle you therefore order enough mating units to hold 360 cells at once, and you run those units on a roughly five-week turn so that a new round of cells is ready as the previous batch is pulled.
Adjustment follows the structure of the funnel. If losses sit early, buy better cups, better lighting and a better grafting bench. If losses sit late, spend on drones, spacing and yard layout rather than on more cups. If the whole funnel runs thin, the builder is probably under strength, and the fix is more bees per builder rather than more builders.
Where queens are intended for sale rather than for internal use, plan a second set of units: catching and banking mated queens changes the turn time of the yard, and holding birds beyond about three weeks in units costs you longer-lasting queens.
Season windows: two hemispheres
Colony condition and drone availability set the season, so read this paragraph against the latitude of the yard, not the location of the office.
Northern hemisphere. Strong colonies and drones arrive together from roughly April to July, with a second, weaker window in August for autumn requeening. September and October are planning and equipment months: cell builders are too weak to matter, drones are being evicted, and this is the time to place the woodenware, nuc bodies and cup orders needed for spring. Catching emergency cells in late September gives poor queens and a yard that goes into winter with gaps.
Southern hemisphere. Same biology, opposite calendar: signal from roughly September to December with a possible run into February or March, planning falling in June to August. Australian and New Zealand builders typically say the same for heavy end-of-year extraction.
For exporters shipping from China, note that lead time changes which window you can serve. A full container of nuc bodies has to be ordered across the sea-line before the season starts; shipping mid-season arrives after it. Seasonality rules two ways: order in the off-season, sell into theirs.

Caging, marking and banking
Once birds are laying and graded, handling decides whether they survive into a customer’s hive. Queen mailing cages run on a candy plug: workers eat through and release her in 24 to 48 hours. Introduction cages of the Miller pattern sit between frames and work for the same job but can be reused. Where a queen is put into a new colony, matching her arrival to the colony’s own queenlessness is more important than cage type.
Marking the same day she is caught saves a second handling. The international colour code repeats on a five-year cycle, so pens have to be stocked to the year, and mixed stock from previous years in the drawer is the usual source of error. Numbered discs earn their keep only where the records are kept with enough discipline to use them.
Banking is the release valve. Queens can be banked up to 21 days with minimal loss, either in the cages they arrived in or on banks holding ten between them. Banking across poor weather or a sliding order is usually less costly than running the yard hot; the alternative is either culling or shipping in bad conditions.
Instrumental insemination: when the programme needs a bench
If the goal is controlled crosses rather than mated queens, mating yards cannot deliver it and instrumental insemination is the only route. It changes the equipment list: bench, microscope optics, syringe and tip, carbon dioxide supply for anaesthesia and for post-mating treatment, and a steady supply of drones from known mothers. Published programmes report fertilisation success in a broad band rather than a single figure — ranges vary widely by source and operator, so ask for the operator’s own records rather than a headline number.
The two equipment facts that catch buyers out: drones have to be collected at sexual maturity, which puts the same six-week lead time on drone rearing; and inseminated queens need banking and handling skills that a mating-yard crew will not have without training. Buying the device before training the operator is a common way to waste several thousand dollars of equipment.
Records, and what they change in next year’s order
Record at four points and nowhere else: acceptance at D+2, cells moved at D+10, emergence at D+12 and laying at D+26. Four numbers per cycle, per family line, tell you which part of the programme is actually costing you queens.
Keep the source colony ID on the grafting record as well. Over two seasons that column turns into a ranking of breeder lines on acceptance and on queen quality, and that ranking is the product you eventually sell. Container orders follow from it: a family line that consistently produces better queens is worth building the whole yard around, and the equipment numbers change accordingly.
What to specify on the factory order
A container is not a catalogue order. Four things belong in the specification before production starts, because none can be fixed after loading:
Dimensional compatibility. Cell cups to bars, bars to frames, frames to your national hive standard. Send your existing frame drawing with the order. The export standard for treated wooden packaging is set by ISPM 15, published by the International Plant Protection Convention, and wood crates and pallets have to be stamped to it or they are stopped at the border.
Material identity. State the steel grade for grafting tools and any contact surface, and ask for the mill certificate rather than a generic “stainless” claim. Plastics should be identified by resin, with a declaration covering the specific colour used.
Spare parts per hundred units. Mini mating units lose lids, sliders and feeders. A pallet of 288 units with no spares is running at reduced capacity by its second season.
Mixed loading. Most programmes need the whole range in one shipment rather than one pallet of one item. A factory that can load cell cups, rearing frames, grafting tools, cages, marking equipment and nuc bodies into the same container saves two freight charges and three weeks.
The shared core of the list is where most first orders start: a stainless steel grafting tool with a tip that matches the cup profile, a suitable supply of cell cups produced from a silicone mould, and a mating unit built for repeats — the Apidea pattern mini mating nuc is the established format for high-density yards. The full set, including cages, marking tools and rearing frames, sits under queen rearing & queen cage, and all of it can be loaded together.
Equipment checklist for the first production cycle
- Fix the target: number of laying queens needed per cycle, and the date they must be laying. Everything else follows from those two.
- Convert the target into grafts using the funnel above, then into cell cups and bar capacity, and check that the builder can physically hold that many cells.
- Count mating units required at the peak of the cycle, not per round: cells introduced — 360 in the worked example — and add the units lost to robbing, ants and transport.
- Census drone supply before scaling the yard. Ten drone mother colonies per mating unit is the ratio to argue against; start colonies six weeks before grafting.
- Order cups to the round count, then add spares: cups are lost in priming, stripping and washing.
- Order two grafting tools per grafter, not one. A bent tip mid-run costs the difference between the full batch and a partial one.
- Confirm the drawings before production: cup to bar, bar to frame, frame to your hive standard.
- Get the paperwork: steel mill certificates for tools and any contact part, resin declaration for plastics, ISPM 15 stamp on every wood pack.
- Specify spares per hundred units — lids, sliders, feeders for mating units, replacement tips for tools.
- Shipping contingencies: measure lead time against the hemisphere you are serving. A pollinator-dependent supply does not wait for a late container.
- Set the four-record sheet before cycle one starts: acceptance, cells moved, emergence, laying.
- Plan the yard, not the box: entrances facing different directions, paint colours varied, spacing wider than feels efficient, water and shade for the catching team.