Building a modular beehive requires careful planning and proper assembly techniques to create a healthy environment for bees. Modular hive designs offer flexibility and easier maintenance while proper ventilation ensures colony health and honey production success. Understanding the assembly process helps beekeepers avoid common mistakes that can harm their colonies.

Modern beekeeping has evolved to include innovative hive designs that make management simpler for both beginners and experienced beekeepers. These systems allow for easy expansion and customization based on colony needs and seasonal changes. The right assembly approach creates a stable foundation that supports bee health throughout the year.
Proper ventilation stands as one of the most critical factors in successful beekeeping. Temperature control and moisture management directly impact colony survival and honey quality. Learning these fundamental principles helps beekeepers create thriving hives that produce healthy bees and abundant honey harvests.
Key Takeaways
- Modular hive designs provide flexibility for easier maintenance and colony expansion
- Proper ventilation controls temperature and moisture for optimal bee health
- Correct assembly techniques prevent common mistakes that can harm bee colonies
Choosing the Right Modular Hive Design
Modular hive designs offer beekeepers flexibility in management and honey production. Each design serves different beekeeping styles, from traditional approaches to natural methods that minimize intervention.
Langstroth Vs. Top Bar Vs. Warre Hives
Langstroth Hive Features: The Langstroth hive remains the most popular choice among beekeepers worldwide. This design uses movable frames that allow easy inspection without destroying comb.
Langstroth hives stack vertically with standardized boxes. Beekeepers can add supers as colonies grow. The design works well for honey production and commercial operations.
Top Bar Hive Characteristics: Top-bar hives offer a more natural experience for both bees and beekeepers. Bees build comb naturally from wooden bars without foundation.
This horizontal design requires less lifting than vertical hives. Top bar hives work well for small-scale beekeeping and natural methods.
Warre Hive Benefits: The Warre hive combines natural beekeeping with manageable design. Bees build comb from top bars in smaller boxes that stack vertically.
This design mimics natural bee behavior while allowing inspection. Warre hives require less intervention than Langstroth systems.
Factors for Selecting Hive Types
Climate Considerations: Hot climates benefit from hives with good ventilation. Climate affects hive performance and bee health significantly.
Cold regions need hives that retain heat well. Langstroth hives with proper insulation work better in harsh winters.
Available Space: Small yards suit horizontal top-bar hives better than tall vertical designs. Urban beekeepers often prefer compact modular systems.
Large apiaries can accommodate multiple hive types. Commercial operations typically use standardized Langstroth equipment.
Physical Limitations: Heavy lifting required for Langstroth supers may not suit all beekeepers. Top bar hives eliminate the need to lift heavy boxes.
Older beekeepers often prefer horizontal designs. Physical comfort affects long-term beekeeping success.
Design Considerations for Beekeepers
Management Style: Hands-on beekeepers prefer Langstroth hives for detailed inspections. These hives allow frame-by-frame examination of colonies.
Natural beekeeping advocates choose Warre or top-bar designs. These systems require less intervention and disturbance.
Honey Production Goals: Commercial honey production works best with Langstroth hives. Standardized equipment and extracting methods increase efficiency.
Small-scale honey harvesting suits top-bar hives well. Cut comb honey provides premium product options.
Equipment Compatibility: Langstroth hives use standardized frames and equipment. Parts interchange between manufacturers easily.
Top-bar and Warre hives require specific equipment. Custom builds may limit future expansion options.
Budget Constraints: Initial costs vary significantly between hive types. Langstroth systems require more equipment but offer long-term versatility.
DIY builders often prefer simpler top-bar designs. These hives use basic materials and construction methods.
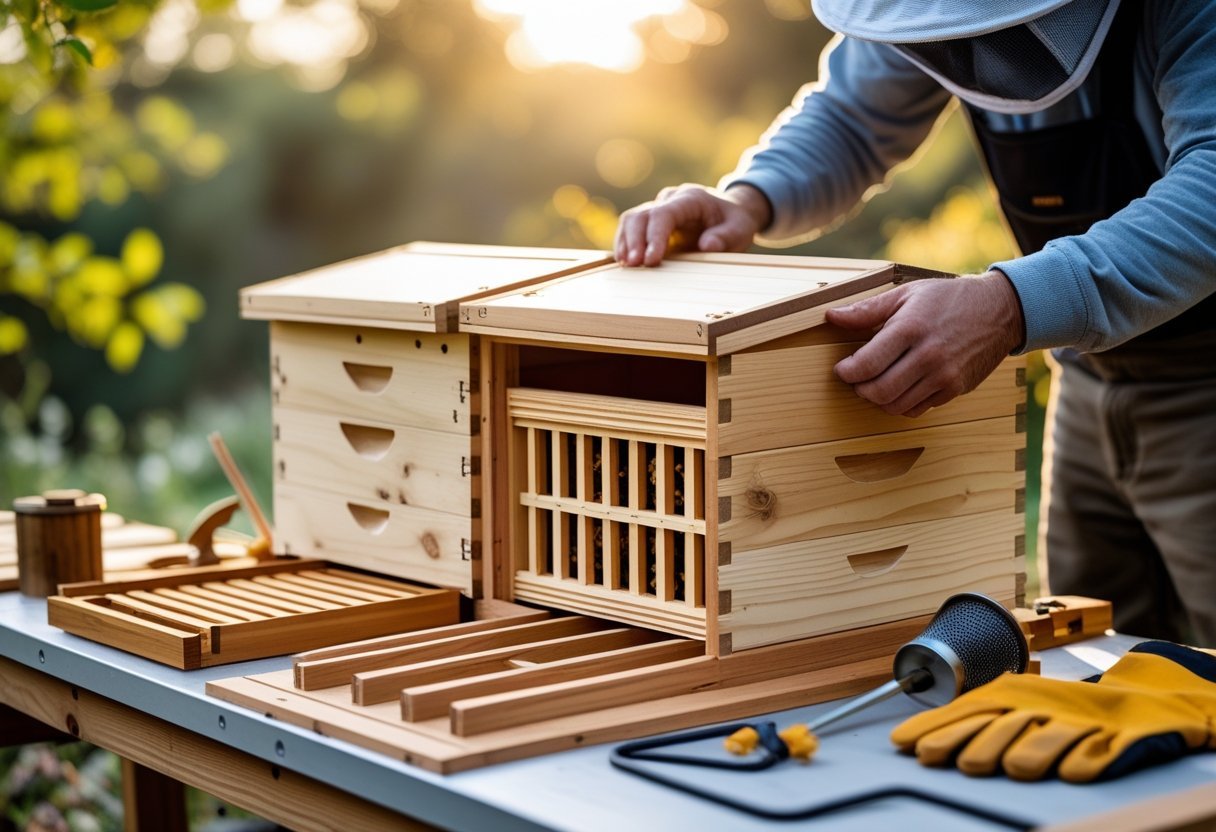
Step-by-Step Beehive Assembly Process
Proper beehive assembly requires organizing components like hive boxes, frames, and foundation before beginning construction. Most beekeepers start with the bottom board and hive stand, then add hive bodies with assembled frames before installing inner and outer covers.
Gathering Hive Components and Tools
Beekeepers need specific components and tools before starting assembly. The main hive components include the bottom board, hive bodies, frames, foundation, inner cover, and outer cover.
Essential tools include:
- Hive tool for prying apart components
- Smoker for calming bees during later inspections
- Rubber mallet for gentle hammering
- Drill with 5/64″ and 7/64″ bits
- Wood glue for extra joint strength
Most beehive kits come with telescoping top covers, inner covers, and bottom boards already assembled. The frames, foundation, and bee boxes typically arrive unassembled.
Check that all components match the hive style. Langstroth hives use standardized parts that fit together uniformly. Count frames to ensure each hive body has the correct number, usually 8 or 10 frames per box.
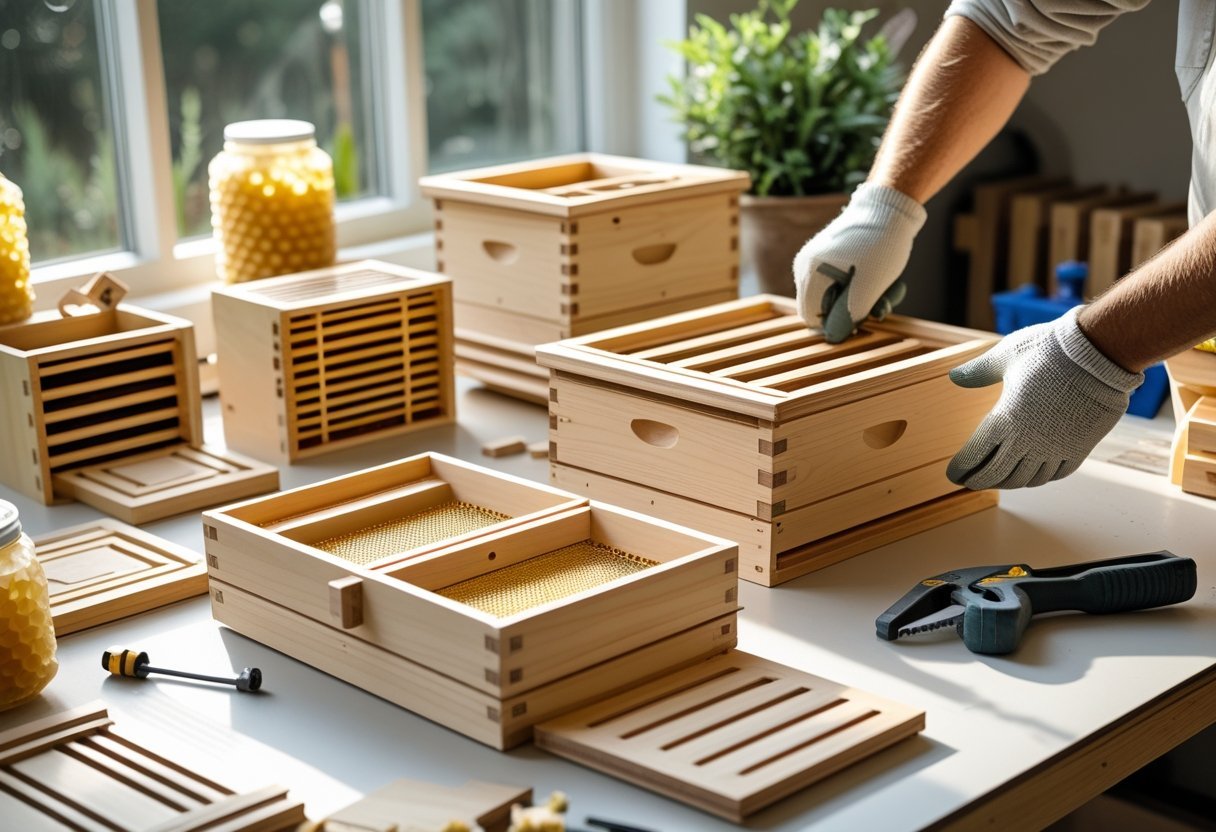
Assembling Hive Boxes and Frames
Dovetail joints provide superior strength and keep bee boxes perfectly square. These triangular cutouts interlock in only one direction, preventing incorrect assembly.
Dovetail Joint Assembly:
- Apply wood glue to joint surfaces
- Place long board on flat surface with handle facing down
- Align grooves on short board
- Use rubber mallet to hammer alternating points
- Add remaining boards using same technique
Predrill holes to prevent wood splitting. Use a 7/64″ drill bit for 1.5″ nails on box joints. Use 5/64″ bits for 1″ nails on frame assembly.
Frame Construction Steps:
- Insert foundation into bottom groove of top bar
- Align side bars with top bar
- Secure with 1″ nails through predrilled holes
- Ensure foundation sits flush in grooves
Frame assembly requires precision. Foundation must fit snugly without buckling or gaps that bees could exploit.
Installing the Bottom Board and Hive Stand
The hive stand elevates the bottom board off the ground for better ventilation and moisture control. Place the stand on level ground away from foot traffic.
Bottom Board Types:
- Screened bottom boards improve ventilation and mite control
- Solid bottom boards provide traditional hive flooring
Position the bottom board on the hive stand with the entrance facing southeast when possible. This orientation provides morning sun while avoiding harsh afternoon heat.
Check that the bottom board sits level on the stand. An unlevel hive can cause comb building problems and make hive tool work difficult.
Some bottom boards include entrance reducers. These wooden strips narrow the entrance opening during certain seasons or when establishing new colonies.
The bottom board should extend slightly beyond the hive body to provide a landing area for returning bees. This landing board helps bees orient to their hive entrance.
Adding Inner and Outer Covers
The inner cover sits directly on top of the uppermost hive body. It provides dead air space for insulation and prevents bees from gluing the outer cover to the frames.
Inner Cover Installation:
- Place flat side down during warm weather
- Position notched side up for winter ventilation
- Ensure proper fit without gaps along edges
The outer cover protects the hive from weather. Telescoping covers extend down over the hive body edges for better weather protection.
Outer Cover Placement:
- Center over inner cover
- Press down firmly to create tight seal
- Check that cover overhangs equally on all sides
Weight the outer cover with a rock or brick in windy areas. This prevents the cover from blowing off during storms.
Some beekeepers add ventilation holes to outer covers for improved air circulation. These holes help prevent condensation buildup during winter months.
Optimizing Ventilation and Hive Health
Proper ventilation prevents moisture buildup that leads to disease while strategic placement shields colonies from environmental threats. Effective airflow systems combined with pest barriers create healthy conditions for strong bee populations.
Creating Effective Airflow Systems
Bottom boards with screened openings allow air to enter from below while top vents let warm, moist air escape. This creates natural airflow that prevents condensation buildup inside the hive.
Ventilation Components:
- Bottom entrance: 3/8 inch height prevents larger pests while allowing airflow
- Top vents: Small holes or notches in the inner cover release moisture
- Screened bottom boards: Improve air circulation and help with varroa mite monitoring
Beekeepers should avoid blocking ventilation holes during assembly. The hive needs consistent air movement to maintain proper humidity levels between 50-60 percent.
Winter ventilation requires special attention. Condensation can drip onto the cluster and chill bees. A small upper entrance or tilting the hive slightly forward helps moisture escape while protecting the colony from cold drafts.
Protecting Against Pests and Diseases
Ventilation design directly impacts disease prevention. Poor airflow creates damp conditions that encourage American foulbrood and European foulbrood bacteria to spread rapidly through the colony.
Common Hive Threats:
| Pest/Disease | Prevention Method |
|---|---|
| Varroa mites | Screened bottom boards for monitoring |
| Small hive beetles | Entrance reducers limit access points |
| Wax moths | Strong ventilation prevents moisture buildup |
| American foulbrood | Dry conditions slow bacterial growth |
Small hive beetles thrive in weak colonies with poor ventilation. They lay eggs in cracks and crevices where moisture collects. Proper airflow keeps these areas dry and less attractive to beetles.
Wax moths target stored comb and weak colonies. Good ventilation helps strong colonies defend themselves by maintaining optimal temperature and humidity levels that favor bee activity over moth reproduction.
Placement and Environmental Control
Hive placement affects natural ventilation patterns and colony health. Sites with morning sun and afternoon shade provide ideal temperature regulation without overheating.
Optimal Placement Guidelines:
- Wind protection: Gentle breeze helps ventilation but strong winds stress bees
- Drainage: Elevated sites prevent water pooling around the hive
- Air circulation: Avoid enclosed spaces that trap stagnant air
Beekeepers should position hives to catch prevailing breezes while blocking harsh winds. Natural windbreaks like shrubs or fences create protective barriers without completely stopping airflow.
Ground moisture affects hive conditions significantly. Wet soil increases humidity around the hive and can lead to condensation problems. Hive stands raise colonies at least 8 inches off the ground for better drainage and ventilation.
Queenlessness often results from environmental stress caused by poor ventilation and overheating. Proper airflow helps maintain stable conditions that support healthy queen performance and brood development.
Maintaining and Harvesting from Beehives
Proper beehive maintenance involves regular inspections every 7-14 days during active season and careful monitoring of colony health. Successful honey harvesting requires timing, proper techniques, and understanding when frames contain at least 80% capped honey.
Regular Inspections and Monitoring
Beekeepers should inspect their beehives every 7-14 days during spring and summer months. Weekly checks help identify problems early and prevent colony collapse.
Key inspection points include:
- Queen presence and egg laying patterns
- Brood development stages
- Food stores and pollen availability
- Disease or pest indicators
- Space requirements for expansion
During inspections, beekeepers look for the queen or fresh eggs laid within the past three days. Healthy brood appears in solid patterns without gaps or discoloration.
Varroa mites pose the biggest threat to bee colonies. Beekeepers monitor mite levels using sticky boards or alcohol washes. Treatment becomes necessary when mite counts exceed 3% of the bee population.
Colony population grows rapidly in spring. Beekeepers add supers before bees run out of space to prevent swarming. Crowded colonies often prepare to swarm by building queen cells along frame edges.
Foundation and Comb Management
Beeswax foundation provides the base structure for bees to build honeycomb. Quality foundation ensures straight, properly spaced comb that fits standard frames.
Foundation types include:
- Wired beeswax foundation for durability
- Unwired foundation for cut comb honey
- Plastic foundation with wax coating
- Foundationless frames for natural building
Honeycomb foundation should be replaced every 3-4 years as it darkens and accumulates chemicals. Old comb restricts brood development and harbors diseases.
Bees build comb faster on fresh foundation during nectar flows. Beekeepers install new foundation sheets in the center of brood chambers where bees work most actively.
Frame spacing affects comb quality. Standard spacing measures 1.25 inches from center to center. Proper spacing prevents bees from building burr comb between frames.
Harvesting Honey Techniques
Honey harvesting occurs when frames contain at least 80% capped cells. Capped honey has moisture content below 18.5%, preventing fermentation during storage.
Traditional harvesting steps:
- Remove frames from supers
- Uncap cells with heated knife
- Extract honey using centrifugal force
- Strain honey through filters
- Store in clean containers
Flow hive systems simplify harvesting by allowing honey to drain directly from frames. Beekeepers turn a key to split honeycomb cells and honey flows through tubes into collection containers.
Harvesting honey works best on warm days when more bees stay in the field. Beekeepers wear protective gear and use smokers to calm defensive bees during frame removal.
Never harvest honey from brood chambers where bees raise young. Only take excess honey from supers placed above queen excluders. Colonies need 40-60 pounds of honey stores for winter survival.
Frequently Asked Questions
New beekeepers often have questions about modular hive assembly steps, ventilation requirements, and material selection. These common concerns help ensure successful hive construction and healthy bee colonies.
What are the essential steps for assembling a modular beehive?
Beekeepers should start by selecting a suitable location that allows easy access for maintenance work. The assembly process requires methodical work to ensure each hive component fits together properly.
The first step involves preparing the bottom board or base component. This foundation piece must be level and stable before adding other hive parts.
Next, beekeepers attach the deep hive bodies or brood boxes. These boxes house the main bee colony and brood comb.
The frames come next and slide into the hive bodies. Each frame holds foundation material where bees build their comb.
Queen excluders go between the brood boxes and honey supers if used. These prevent the queen from laying eggs in honey storage areas.
Honey supers stack on top of the brood boxes. These shallow boxes collect excess honey for harvesting.
The inner cover fits over the top super. This cover provides insulation and ventilation space.
Finally, the outer cover or roof protects the entire hive from weather. It should overhang slightly to shed rain away from the hive body.
How do I ensure proper ventilation when building a beehive?
Proper airflow prevents moisture buildup that can harm bee colonies. Ventilation also helps bees regulate hive temperature during hot weather.
Bottom ventilation starts with a screened bottom board. This allows air to flow up through the hive while keeping pests out.
The inner cover should have a centered hole or notch. This creates an air passage between the top super and the outer cover.
Some beekeepers add small ventilation holes in the upper hive bodies. These holes should be about 1/4 inch in diameter and covered with screen material.
Entrance reducers help control airflow during different seasons. Larger openings provide more ventilation in summer while smaller openings conserve heat in winter.
Avoid creating too much ventilation that disrupts the bees’ climate control. Bees work hard to maintain specific temperature and humidity levels inside their hive.
Can you provide a clear diagram of beehive parts and their functions?
A standard modular beehive consists of several stacked components. Each part serves a specific purpose in the hive system.
The bottom board forms the hive floor and entrance. It supports the entire structure and provides the main bee entrance.
Deep hive bodies hold 8-10 frames for brood rearing. These boxes are typically 9 5/8 inches tall and house the queen and developing bees.
Frames hold foundation sheets where bees build comb. Standard frames measure 19 inches long and fit snugly inside hive bodies.
The queen excluder is a flat screen that allows workers through but blocks the larger queen. This keeps brood separate from honey storage areas.
Honey supers are shallow boxes for honey storage. They use the same frame width but are only 6 1/4 inches tall.
The inner cover sits directly on the top super. It has a hole for ventilation and bee movement.
The outer cover or telescoping cover protects the hive from weather. It should extend past the hive body edges for rain protection.
What materials are needed to construct a beehive from scratch?
Pine or cedar wood works well for hive construction. These materials resist weather and provide good insulation for the bee colony.
Beekeepers need 3/4-inch thick boards for hive bodies and covers. Thinner 1/2-inch boards work for inner covers and bottom boards.
Standard hardware includes wood screws, nails, and wood glue. Stainless steel or galvanized fasteners prevent rust and corrosion.
Screen material is essential for bottom boards and ventilation. Use 1/8-inch hardware cloth to keep pests out while allowing airflow.
Foundation sheets provide the base for comb building. Choose either wax or plastic foundation depending on personal preference.
Frame wire helps support the foundation sheets. This prevents sagging when frames are full of honey.
Wood preservatives protect exterior surfaces from weather damage. Choose bee-safe products that won’t harm the colony.
Basic woodworking tools include a saw, drill, and measuring tools. Some woodworking experience is helpful for achieving proper fit and finish.
Where can I find detailed beehive plans suitable for beginners?
Many beekeeping supply companies offer step-by-step assembly guides for their hive kits. These guides include detailed instructions and illustrations.
Educational resources from beekeeping associations provide standard hive dimensions. These ensure equipment compatibility between different manufacturers.
Online beekeeping forums share construction tips and modifications. Experienced beekeepers often post photos and advice about their building projects.
Local beekeeping clubs offer hands-on workshops for hive construction. These sessions provide direct instruction and tool access for beginners.
Extension services publish bulletins with hive building information. These publications focus on proper construction techniques and standard measurements.
Complete beginner guides explain the entire process from start to finish. They include material lists and assembly sequences.
Some manufacturers offer pre-cut kits that reduce the woodworking required. These kits include all necessary parts with assembly instructions.
What are the best practices for maintaining a healthy bee colony in modular hives?
Regular hive inspections help identify problems before they become serious. Beekeepers should check colonies every 7-14 days during active season.
Proper spacing between frames prevents bees from building excess comb. Standard bee space of 3/8 inch allows bees to move freely.
Clean equipment prevents disease transmission between colonies. Scrape off old wax and propolis regularly from hive components.
Adequate ventilation prevents moisture problems that lead to mold and disease. Adjust ventilation based on season and weather conditions.
Pest management includes monitoring for varroa mites and other threats. Use integrated pest management techniques rather than relying only on chemical treatments.
Food stores should be monitored especially before winter. Colonies need 40-60 pounds of honey to survive cold months.
Queen performance affects the entire colony’s health. Replace queens that show poor egg laying or aggressive behavior.
Seasonal management includes adding